Table of Contents
When many aspiring artists and hobbyist designers sit down to draw, they assume professional illustrators rely purely on unguided intuition. The romantic image of a creator producing a flawless portrait or a complex perspective blueprint with a single sweeping gesture persists across popular culture.
In reality, master artists, architects, and technical draftsmen have relied on geometric grids for centuries. From Renaissance studios using string-wound viewing frames to modern industrial designers blocking out concept sketches, the grid is one of the most reliable structural tools available.
Graph paper provides a reliable frame of reference. It removes the guesswork from proportions, simplifies complex reference images into manageable blocks, and ensures that visual designs retain structural balance from initial concept to finished piece.
Why Human Eyes Struggle with Proportion (and How Grids Help)
One of the most persistent hurdles in freehand drawing is optical distortion. The human brain does not perceive objects neutrally; it exaggerates features it deems significant.
       Reference Photo                  Freehand Distortion
   ┌──────────────────────┐           ┌──────────────────────┐
   │    ┌───┐    ┌───┐    │           │   ( O )        ( O )  │ <- Eyes drawn
   │    │ o │    │ o │    │           │                       │    too large
   │    └───┘    └───┘    │           │           v           │
   │          v           │           │        ──────         │ <- Mouth misaligned
   │       ───────        │           └──────────────────────┘
   └──────────────────────┘
 (Actual balanced facial ratios)    (Brain prioritizes expressive areas)
When drawing a portrait, beginners almost always draw eyes too large, place foreheads too low, and compress the lower jaw. When rendering vehicles or furniture, foreshortening effects cause angles to twist out of true perspective.
Graph paper neutralizes this cognitive bias by introducing an objective, non-negotiable metric:
- It forces the artist to judge relationships by coordinates rather than subjective impressions.
- It reveals negative space—the shape of the empty air surrounding an object—making contours as easy to judge as the subject itself.
- It breaks down complex continuous curves into distinct segment coordinates with identifiable horizontal and vertical offsets.
The Grid Method: Breaking Intimidating References into Manageable Units
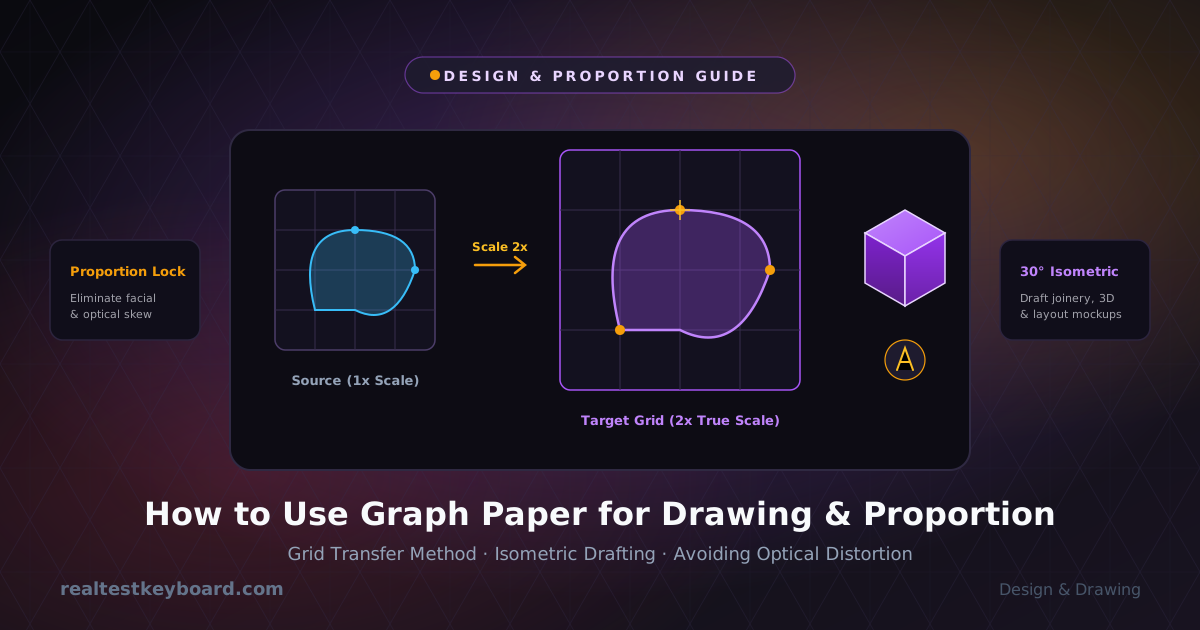
The “grid method” is an accessible, time-tested technique for copying or scaling reference imagery with high fidelity.
Step 1: Overlay Grid on Source        Step 2: Draw Target Grid on Canvas
       A    B    C                           A       B       C
    ┌────┬────┬────┐                      ┌───────┬───────┬───────┐
  1 │    │  •─┼──  │                    1 │       │   •───┼──     │
    ├────┼────┼────┤                      ├───────┼───────┼───────┤
  2 │  •─┼────┼─•  │                    2 │   •───┼───────┼──•    │
    ├────┼────┼────┤                      ├───────┼───────┼───────┤
  3 │    │ ───┴──  │                    3 │       │  ─────┴──     │
    └────┴────┴────┘                      └───────┴───────┴───────┘
      (Small 1x1 cells)                    (Scaled up 2x2 cells)
1. Preparing the Reference
The creator divides a reference image into a uniform grid of squares, labeled alphabetically across the top columns and numerically down the rows (e.g., A1 through D6).
2. Constructing the Working Grid
On the final drawing surface or paper, an identical grid is drawn with matching proportions. To enlarge an image by a factor of two, a 1-centimeter reference grid is replicated as a 2-centimeter target grid.
3. Systematic Cell-by-Cell Transfer
Instead of attempting to capture an entire horse, car, or building in one continuous pass, the artist observes single cells in isolation:
- Where does the contour enter cell B2 along the left edge? At the midpoint, or one-third from the top?
- Where does the line exit?
- What fraction of cell C3 remains negative space?
By focusing on isolated lines and intersections within an individual box, cognitive preconceptions fade away. The artist renders abstract shapes and intersections accurately, and when viewed as a whole, the overall composition snaps into balance.
Choosing the Right Grid for Your Design Discipline
Different creative workflows require specialized grid geometries. While standard squares handle most everyday tasks, alternative grid configurations unlock distinct design workflows.
1. Square Grids (Cartesian)
The standard grid of uniform squares is the workhorse of layout design, 2D floor plans, typography, and pixel art.
- Best for: Floor plans, graphic design layouts, icon construction, and direct 2D image scaling.
- Practical tip: Use quarter-inch or 5mm spacing for general sketching; drop to 2mm or 1mm grids when designing intricate logos or lettering.
2. Isometric Grids (60-Degree Triangles)
Isometric paper consists of vertical guide lines crossed by diagonal lines angled at 30° to the horizontal. This produces a network of equilateral triangles that allow creators to draw three-dimensional objects without perspective foreshortening.
         Isometric Axis Orientation
                 | (Vertical Height)
                 |
                 |
               /   \
(30° Width) / \ (30° Depth)- Best for: Product design concepts, woodworking joinery sketches, video game environment assets, and architectural massing diagrams.
- Key advantage: Parallel lines remain parallel regardless of distance, meaning measurements can be transferred along any of the three primary axes at a consistent 1:1 scale.
3. Perspective Grids
Unlike isometric setups, perspective grids feature lines radiating from one, two, or three vanishing points toward a horizon line.
- Best for: Dynamic environment art, vehicle concept drafting, and realistic interior staging.
- Key advantage: Graph paper lines act as guide rails, preventing tilted floors, distorted walls, or mismatched convergence angles.
Practical Drawing Workflow: From Grid Blueprint to Polished Art
To get the most out of graph paper without producing rigid, mechanical artwork, follow this structured four-stage workflow.
[Phase 1: Grid Setup] ──► [Phase 2: Landmark Anchoring]
                                   │
                                   ▼
[Phase 4: Detail & Inking] ◄── [Phase 3: Relational Contours]
Phase 1: Establish Scale and Margins
Before making expressive marks, define your scale ratio. For an architectural floor plan or furniture sketch, decide whether one grid square represents six inches, one foot, or one meter.
Mark your primary bounds and leave sufficient border space for notes, callouts, or dimensions.
Phase 2: Anchor Key Visual Landmarks
Identify the structural vertices of your subject. In a portrait, this includes the corners of the eyes, the base of the nose, and the edges of the lips. In an industrial sketch, it includes corner posts, wheel centers, and mounting brackets.
Mark these critical coordinates as subtle dots on grid intersections before drawing continuous lines.
Phase 3: Block in Relational Contours
Connect the dots using light, rhythmic strokes. Continually check surrounding grid lines:
- Is this diagonal segment running at roughly a 45-degree angle (traversing one unit up for every unit across)?
- Does this circular arch touch the ceiling grid line at the exact center of the cell?
Keep pencil pressure light so these structural guidelines remain easy to adjust.
Phase 4: Tone, Ink, and Grid Elimination
Once proportions are confirmed, darken the essential contours using ink or softer graphite. If working on paper, erase the initial grid lines gently with a kneaded eraser.
If working with digital layers, hide or reduce the opacity of the underlying grid layer, leaving only the balanced, proportional illustration.
Physical Graph Pads vs. Digital Grid Drafting
Modern designers and illustrators frequently move back and forth between physical sketchbooks and digital screens. Each medium has distinct advantages depending on project scope.
       Physical Paper Sketching               Digital Grid Drafting
   ┌───────────────────────────────┐     ┌───────────────────────────────┐
   │ • Fast tactile exploration    │     │ • Infinite zooming & panning  │
   │ • No screens or charging      │     │ • Non-destructive grid layers │
   │ • Fixed line weight & scale   │     │ • Dynamic spacing adjustment  │
   │ • Manual erasure fatigue      │     │ • Lossless vector/image export│
   └───────────────────────────────┘     └───────────────────────────────┘
Physical graph notebooks excel during the earliest ideation stages. Flipping through a pocket grid pad at a construction site, wood shop, or coffee shop allows for immediate, uninhibited capture of spontaneous ideas.
However, physical paper can be limiting when designs must be revised, scaled, or repurposed for client presentations.
When preparing custom design templates, technical mockups, or layered sketches, using an online graph paper tool gives creators precise control over grid line spacing, background styles, and page dimensions.
Drafting digitally allows designers to sketch complex objects, snap geometric shapes cleanly into position, and export clean digital files without messy graphite smudges or scanning distortions.
Avoiding Common Mistakes in Grid-Based Drawing
While grids provide invaluable structure, falling into a few common traps can result in stiff or uninspired drawings.
1. Becoming a Human Photocopy Machine
The goal of the grid method is to guide structural proportion, not to turn drawing into mindless tracing. Do not render each square to completion before moving to the next.
Always step back, view the entire composition, and verify that the line weight, gesture, and overall rhythm remain energetic and coherent.
2. Selecting Inappropriate Grid Density
Choosing the wrong grid frequency can sabotage a project before it begins:
- Too coarse (e.g., 4 huge squares across a portrait): The cells are too broad to provide meaningful assistance with subtle facial curvatures or precise angles.
- Too dense (e.g., hundreds of 2mm squares across a casual sketch): The sheer volume of lines becomes visually confusing, making it easy to miscount cells and lose track of position.
General Rule: Aim for a grid density where major feature changes occur across approximately 10 to 20 subdivisions along the longest axis.
3. Pressing Too Hard with Graphite
When laying down grid lines on physical paper, use a hard lead pencil (such as a 2H or 4H) and maintain an extremely light touch.
Heavy graphite from softer pencils (HB or 2B) grooves the paper fibers, leaving visible indentations that persist even after vigorous erasing.
From Scaffold to Second Nature
The ultimate purpose of working with graph paper is to train the eye. By repeatedly checking lines against perpendicular guides, creators develop an internal compass for proportion, scale, and spatial division.
Over time, you will find yourself noticing midpoint alignments, vertical plumb lines, and proportional relationships even when drawing on completely blank canvases.
Far from being an artistic crutch, the grid is a foundational training ground that empowers artists and designers to render what they see accurately and expressively.
Test every key directly in your browser
Detect stuck keys, key chatter, input latency, and full rollover with our instant, zero-download diagnostic tool.
Start Keyboard Test →